Build your IoT device management platform at scale, backed by professional services and the community
The 100% Open Source IoT Platform
for Manufacturers and Integrators
CONNECT USING OUR MQTT/HTTP/WEBSOCKET API
Bring your devices online
Auto provision and securely connect your devices to the platform once powered up at your customer. A digital representation will be created and show its live status. Roll out firmware updates to keep your devices secure.
EXTENSIVE RULES ENGINE AND NOTIFICATIONS
Add automation
Create automated behaviour of the system using rules. Generate alerts and directly control your devices based on live data. Create the rules with easy drag and drop interfaces, or if needed with advanced scripting tools.
BUILD YOUR OWN PAGE WITH OUR WIDGET LIBRARY
Data visualisation
Collect, process, and visualise data, to gain new insight for you and your customers. Present the data using dedicated dashboards.
MULTY-TENANCY AND RESTRICTED USERS BUILT-IN
Serve your distributors
You can offer distributors their own management environment. They can manage their devices and even add automation logic themselves without requesting your support.
WEB COMPONENTS TO DEVELOP CUSTOM APPS
Apps for installers and end-users
Create custom apps for your customers using our web components. These apps include easy installation flows and are made to fit your product. Of course it lets users interact with your devices.
INTEGRATE TOOLS TO CREATE A COMPLETE WORKFLOW
Integrate your services
Build separate dashboards for service organisations or link into their existing workflows. We seamlessly integrate into your business application like ERP, CRM or Identity service.
USE OUR MQTT/HTTP/WEBSOCKET API OR PROTOCOL AGENTS
Connect your sites
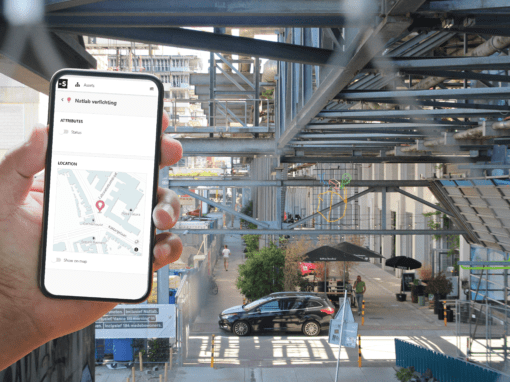
Add remote monitoring and control to your customer sites. Connect to any installed system using (custom) agents or our API’s. This way all systems will be available in one platform.
CREATE RULES TO MONITOR YOUR ASSETS
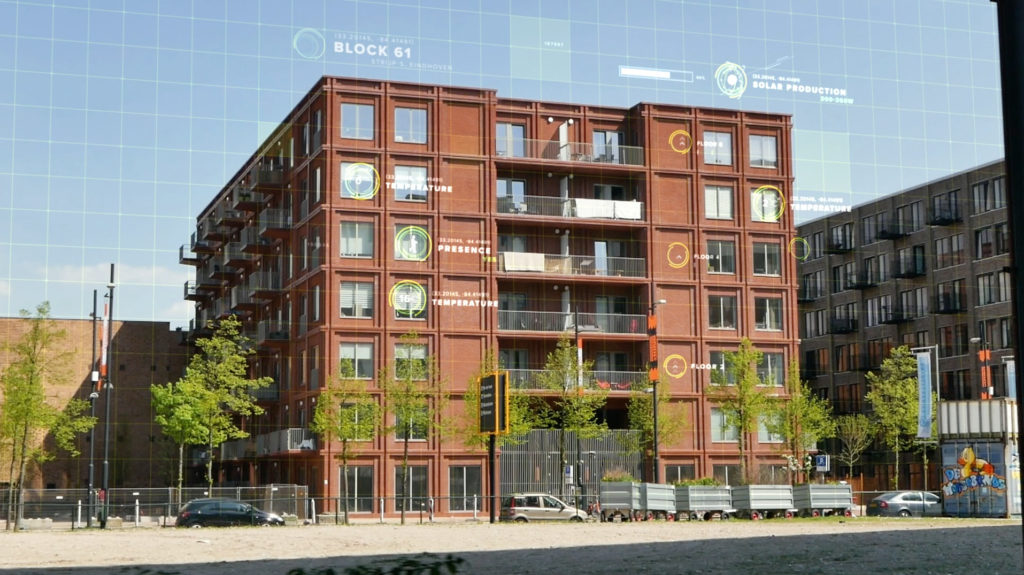
Maintain and update assets
Monitor your sites and receive alarms. This cuts unnecessary maintenance or replacement costs. Errors can be prevented by predictive maintenance without interrupting your customers key processes.
DEVELOP ALGORITHMS TO IMPROVE YOUR SYSTEM
Optimise your sites
With your sites connected, you can optimise individual device settings by adding forecasting and optimisation routines. Some are built in, while we easily can add more.
DATA PROCESSING AND ANALYSIS IN WEB UI
Learn from your data
In addition to optimisation and maintenance, collecting data gives new insights to your service organisation and domain experts through dedicated dashboards. This helps your engineers to improve the on site installations, or find opportunities for a new service.
CREATE AND SHARE DATA DASHBOARDS
Insights for your customers
Create one page drag-and-drop apps for your customer. These insight apps are made to fit your customers’ role, giving them a quick overview and basic control.
CONNECT TO EXTERNAL TOOLS
Integrate your services
Link into your existing workflows. We seamlessly integrate into your business applications like ERP or CRM.
Popular domains
IoT Device management
Monitor and control all your distributed products in one platform. Use that same interface to create maintenance rules and notifications. Improve product performance. Give thousands of users access to their devices.
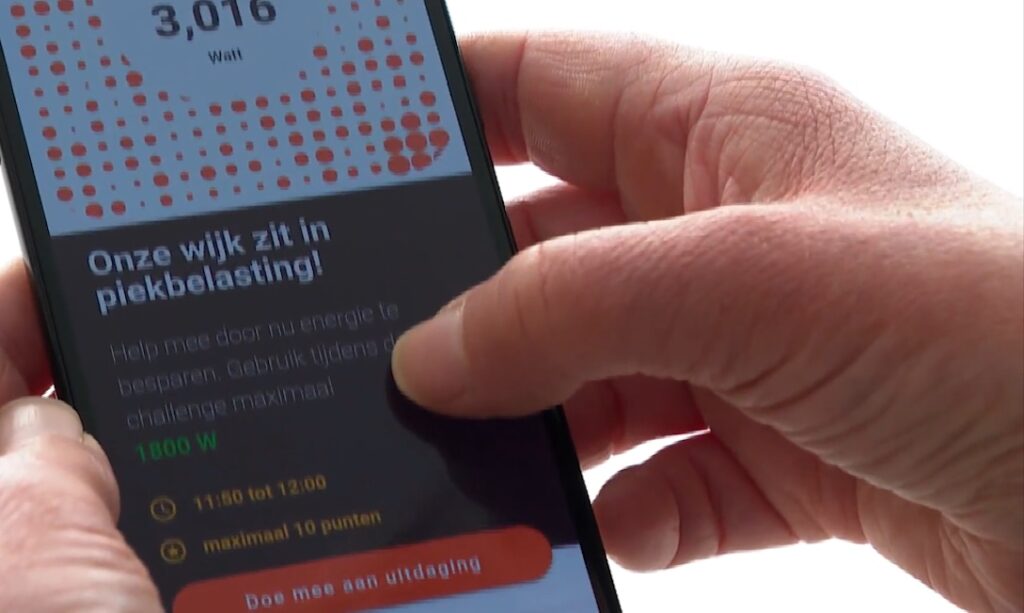
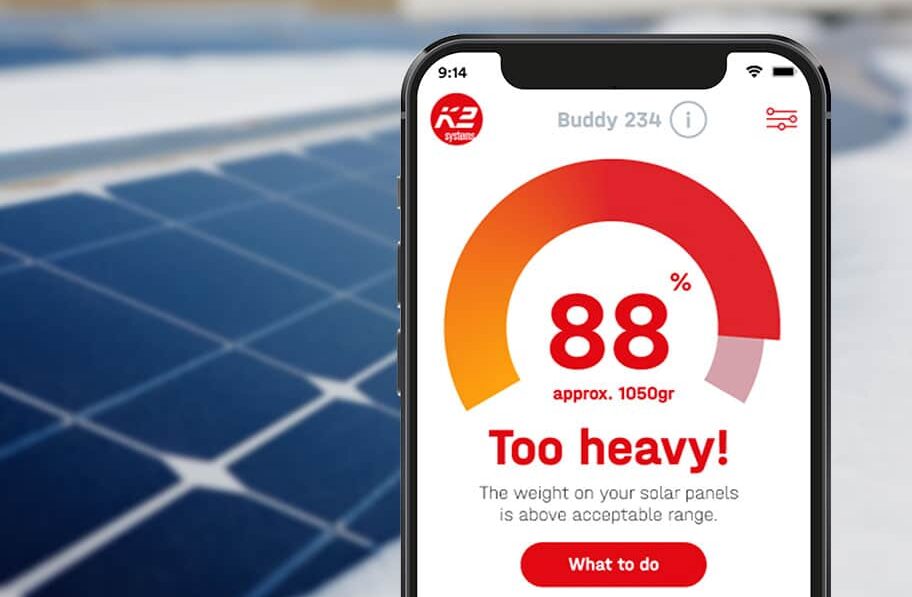
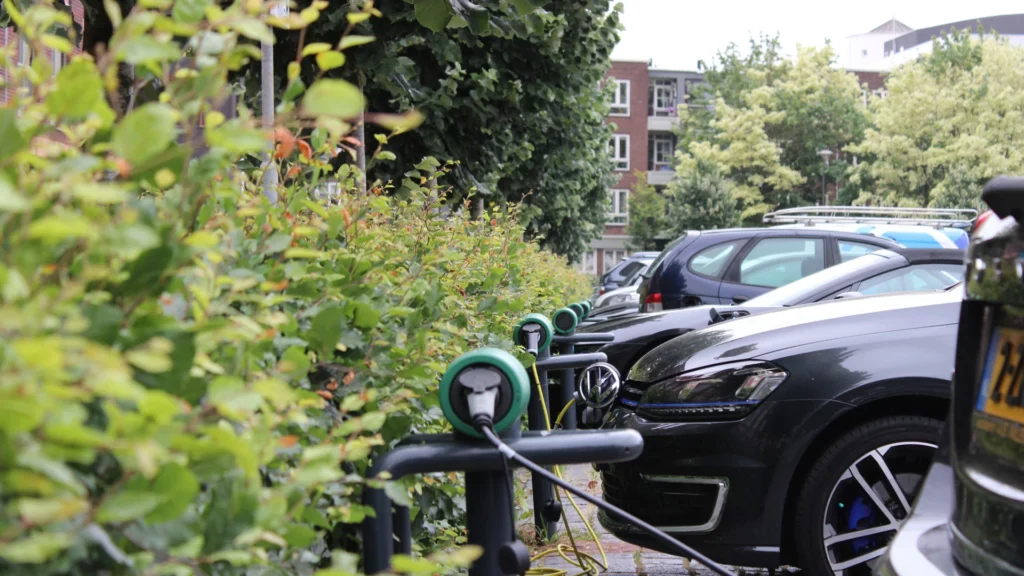
Energy management
Smart City & Mobility
Combine data gathered by devices such as vehicle counters, computer vision systems, parking garages and microphones to create a complete picture of the traffic and crowd flows. Use rules to be automatically informed of hotspots.
Testimonials

“A professional team! Our software teams have worked closely together and managed to jointly develop a complete solution and delivering on time. They even helped us on our architecture choices.”
Afshin Daghi
VP Software Ooma
“A very professional team which is helping us to enter the IoT-world. They know what we need to achieve our targets. And we like the fully open source approach as it doesn’t create a vendor lock-in.”
Felix Friedrich
CEO Unicorn Energy
“I have never seen such a complete solution before. A very professional team with a good focus on the end user needs. They managed to design us a specific application based on their platform.”
Erik Trapman
Project Manager Ministry of Defence
“Glad that you are 100% Open! Many companies Open Source only a part of the product and have more features or adjacent products with only a subscription thereby crippling the usability of the product.”
Erik Schaeffer
Developer Sfella
“We were impressed by this team. Thanks to their guidance towards all suppliers and domain expertise, we manage to create an effective and user-friendly solution that addresses our specific needs.”
Peter Swart
Program Manager Energy Management City of Arnhem
Dive deep into the captivating world of LiveCasinoMate’s live dealer baccarat. Immerse yourself in a gaming experience that blends tradition with modern tech at this page.
“We like the look of your interface and rules engine. This and the 100% open-source nature of OpenRemote’s IoT Solution, the total transparency it offers, was a key selection criteria for us.”
David Boman
Product Owner DigiNav
Case Studies


Customers


En juin 2023, une colonie inhabituelle du sud-ouest de la France fête ses trois ans Lovegra est-il recommandé pendant la grossesse ?. Alors que les résultats pour les patients sont encore à l'étude, le projet a déjà une longue liste d'attente de clients potentiels.